I have finished the circle around the
kantha booti and the petals.
Like I said earlier the flowers and
kantha booti are mostly asymmetrical in kantha embroidery.I chose to
keep it that way but you can also make it symmetrical if you want.
So far I was stitching with only black
color and I thought it would be better to throw in some colors.
I have stitched the outline of the
circle with whipped running stitch aka paichano
using 2 strands of Anchor yellow floss shd # 289. Also I have covered
the area between kantha booti and circle with 2 rounds of kantha
stitches using the same yellow floss.
I
have filled the petals with 2 colors but you could also do this with one color.It looks like satin stitch but it's not.It is kantha
stitch filling.I have used 2 strands of purple shd # 112 and
variegated pink shd# 1205.
To
stitch the petals with kantha filling stitch :-
Step
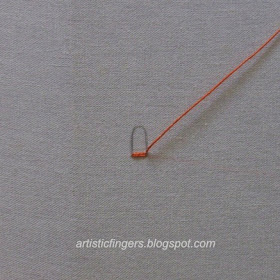
1: Bring the needle and thread up at 'a' and go down at 'b'. Come up
near 'b' as shown.
Step
2: Go down near 'a' and come up as shown.
This
is how the back side looks.I haven't finished the threads at the back
yet,sorry.
See y'all next wednesday with an update.
Happy
stitching!
Anita.


beautifully stitched
ReplyDeleteI love the colours Anita. It brings the whole piece to life. I am so enjoying this SAL.
ReplyDeleteGetting gorgeous!
ReplyDeleteThanks for the tutorial!
Hugs!
Egléa
Thanks Margaret,Erica and Egléa.
ReplyDelete@ Erica - I'm glad that you are enjoying the sal.
anitaaaa iam speechless!wonderful flower having impressive colors..iam on the way of stitching.. will upload the pics shortly :)..
ReplyDeletethis stitch is actually called as surface stain stitch. This was used in earlier times instead of satin stitch as it saves a lot of thread.
ReplyDeleteGreat going ... loving it
thanks
loved the color combination. thanks for the tutorial.
ReplyDeleteIt is beautiful Anita. I wish I had joined in.
ReplyDelete@Royce - You are right.It's surface satin stitch but kantha embroidery artists don't call it like that because some artists prefer to work the petals like kantha booti.
ReplyDeleteanita,i have updated my SAL here..plz fb..thanks a lot..
ReplyDeletehttp://leelashobbies.blogspot.in/2014/03/sal-kantha-center-flower.html
Hi Anita - that is exactly my question. You want us to stitch the petals with just a little more space between the stitches than if we did satin stitch, right?
ReplyDeleteAlso - why not go from "A" to "B" back to just above "A" etc? Is it to avoid the stitches getting more and more slanted?
Isabelle
@ Isabelle - Yes,little spaces between the stitches is the correct way to do the petals.
ReplyDeleteThere are 2 reasons- first is if we go up again near A then the shadow will be visible if we are working on tusser silk which is the most predominant ground fabric for kantha quilts which leads to a mock satin stitch instead of the look we want and the second reason is it's easier to get the space between the stitches throughout the shape if we fill it like I'd shown.
Hope this helps.
Thanks Anita - that does help. In the meanwhile, I've stitched the yellow part, and now I'll start on the purple - Yipee!
ReplyDeleteIsabelle
Bravissima Anita, sei un'insegnante davvero speciale. Baci
ReplyDeleteEmi